JOYE ROOFING

  • Roof Repair
  • Roof Replacement
  • Services
    • Metal Roofing
    • New Construction Roofing
    • Roof Inspection
    • Commercial Roofing
    • Gutter Installation
  • Financing
  • About
    • Testimonials
    • Service Areas
  • Contact
  • Roof Repair
  • Roof Replacement
  • Services
    • Metal Roofing
    • New Construction Roofing
    • Roof Inspection
    • Commercial Roofing
    • Gutter Installation
  • Financing
  • About
    • Testimonials
    • Service Areas
  • Contact

How To Prolong The Life Of Your Roof

8/14/2017

 
How to prolong the life of your roof
Prolonging The Life Of Your Roof
How to Prolong the Life of Your Roof

​Because your roof is the first line of defense in inclement weather and represents a serious investment on the part of any homeowner, keeping it in good shape will extend the life of your roof to prevent costly replacement.
Therefore, it is important for you to be aware of simple repairs and preventative measures which may help to extend the life of your roof.
Even though there are other roof materials such as copper, tile, and metal, the majority of roofs have shingles. According to angieslist.com, the quality of the materials and workmanship when the existing roof was put on is the biggest factor in the lifespan of a roof.

Easy maintenance and repair tasks that can diminish the aging and decay of your roof shingles

  • GUTTERS - Keeping the gutters clean will prevent unnecessary water damage to the deckboard, fascia, and soffit boards along the gutter line. This will allow rainwater to properly drain through your downspouts.
  • DEBRIS REMOVAL - Tree branches, leaves, and other debris that may collect along roof valleys should be removed as soon as possible. Cut overhanging branches if there are tall trees around your house. (Check local ordinances to see if you may cut branches that hang over your roof if the tree is not on your property.)
  • ICE DAMS - Check for ice dams that may develop when snow is partially melted.
  • WORN SHINGLES - When shingles wear out or fall off, your roof is exposed to the elements, which causes it to rot or leak. This can mean even more extensive and expensive repairs in the future.
  • POLYMER COATING - Applying a liquid polymer coating can help keep off water and diminish weather damage. This will keep shingles looking newer. These coatings are usually used on new shingle roofs and are available at most home improvement stores. Application takes a few hours.
  • ATTIC VENTILATION - When attic ventilation is poor the temperature during the summer months can hit up to 160 degrees. This can cause premature aging of the roof because the superheated air can penetrate attic insulation. This can affect the cooling of your home, damaging wallpaper, paint, and the floor directly below. On the roof, it can damage your shingles by making them decay more quickly. Even the rafters holding up the roof can be affected by warping and cracking. In the winter excess moisture from bathrooms, and kitchens can build up in the attic. This moisture can collect and condense, soaking attic insulation. The Federal Housing Administration recommends a minimum of at least one square foot of attic ventilation (both intake and exhaust) for every 300 square feet of attic space.
  • INSULATION - Insulation can also extend the life of a roof by protecting the structural components of a building. Because the temperatures on roofs can rise up to 90 degrees higher than the air temperature, roofs will transfer this radiant heat to the attic below. Reduce the transfer of radiant heat by insulating attics with radiant barriers and reflective insulation. This will reflect the heat back to the roof and decrease the temperature in the structure.
  • ROOF CLEANING - Asphalt shingles, especially those in constant shade, can attract algae growth. If done professionally, roof cleaning is not harmful and can improve the curb appeal of a home, and also protect the shingles by allowing them to generate less heat.
  • REGULAR INSPECTIONS - Having your roof inspected regularly at the very minimum of every two or three years is essential. Check the flashing attached to your chimney and vents to see if they are blocked. Inspecting your roof and attic ceilings will help you spot signs of damage, mold, wear, leaks, rot, or any other structural problems.

We hope this information has been informative and helpful. Joye Roofing offers a free roof inspection with an honest assessment on the condition of your roof.

Check out our 5-star rating on Google My Business and Facebook.


​If this information has been helpful, click "like" and "share" below.

Getting A New Roof?

8/7/2017

 
New Roof
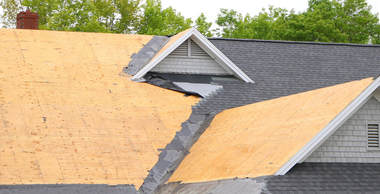
Getting A New Roof? What you should expect to see
What You Should Expect to See
Replacing your roof is a big commitment. It is important that you understand the re-roofing process from beginning to end. After all, your roof is your first line of defense against severe weather for your home - your biggest asset.
Familiarizing yourself with the steps needed to get the job done properly will ensure a successful roof replacement with no major construction or financial surprises during this process.
Before starting the re-roofing process, homeowners need to take some time and effort to evaluate the roofing contractor. Here are some tips to finding the best contractor for your roof replacement, according to allroofingsolutionsde.com.:
  1. Your contractor should be licensed by your state.
  2. Make sure they carry adequate roofing insurance, both indemnity (liability) and worker's insurance. Note the coverage end dates.
  3. Check the warranties they provide because both materials and workmanship warranties can vary. Some roofers may offer comprehensive systems warranties, also. The minimum warranty for one year is standard for the labor, but some roofers offer longer warranties.
  4. Ask for personal references and check online reviews.
  5. Find out if their own people will do the work or will they subcontract. If so, ask for the subcontractor contact information and use this list to ask the same questions.
  6. Asking for a comprehensive written estimate with the start and completion dates, materials to be used, labor cost, permits, workmanship guarantees, materials guarantees, and cleanup expectations will allow you to compare this estimate with other roofing contractors.
  7. Check the certification and training of the contractor in the installation of their products. They should have proven experience in installing this roofing material. Check for trade organizations memberships and the contractor's standing with the Better Business Bureau.
After choosing a reputable roofing contractor, check to make sure they follow the terms of their estimate. Try to plan for clear weather and as much as possible, have the job completed as quickly as possible. The following are seven suggested steps to roof replacement listed below:
  1. PROPERTY PROTECTION - Your entire property should be fully protected while roofing replacement is underway. This means protecting siding, walls, plants, bushes, etc. using tarps and protection plywood. Remove any yard ornaments, grills, potted plants, etc. away from the home.
  2. REMOVAL OF OLD ROOFING MATERIAL - Toe Boards should be set and install any necessary safety precautions for roof traffic. In order to inspect the wood decking, all old shingles have to be removed. A trash container will need to be nearby if an asphalt or other disposable roof materials are be removed. For an asphalt roof, a shingle fork is pushed underneath the shingles and pried upward to curl the roofing off. Work should start at the top going down. The ridge cap shingles should be removed first then sliding the fork underneath each row of shingles prying them up until they are loose.
    If a metal roof is being removed, a storage place will be needed until it can be sold as scrap or repurposed. Drop cloths around the bottom of the roof will protect against any accidental drops.
  3. ROOFING INSPECTION - A thorough inspection of the wood decking will reveal any soft, wet or rotted wood which will need to be replaced. This is an important step. Another important step is to make sure the wood sheeting is attached to the roof rafters correctly. If new shingles are installed without re-nailing the old wood decking, after the new shingles are installed you will see many bumps on your roof. Also inspect the flashing on the roof.
Flashing is usually aluminum or galvanized steel installed over joints on the roof to prevent water seepage. This should include the drip edge and any of the flashing at the roof's valleys, vents and chimney. Vent boots should be in good shape and valley flashing should be without cracks or rust. Usually, the valley flashing should always been replaced because it takes the most abuse from the weather.
  1. PREPARING THE ROOF SURFACE FOR SHINGLES - Drip edge installation involves installing a piece of metal bent at 90 degrees to prevent rain from getting underneath roofing material on all edges. Ice and water shield installation is the next step. This is a special type of roofing underlayment which sticks to the wood decking and prevents any water leaks. It is installed at the bottom of the roof and at all roof penetrations (chimneys, pipe flanges, roof connections, etc.).
  2. NEW ROOFING MATERIAL INSTALLATION - The contractor will follow all the manufacturer's installation instructions. The roofer will use starter shingles at the bottom and the sides and stagger each row to keep shingles from leaking water. Nails holding the shingles in place should be just under the tar strip on the shingles and no heads are showing. Valley flashing goes underneath the shingles if you have any valleys on your roof. This flashing will divert water down your roof and into the gutter system. With the flashing, it is important to put a strong bead of roofing cement over top of the edges of flashing down your roof. This will protect against water blowing up the side of the flashing and underneath the roofing.
If you are installing a metal roof, everything should be square before starting. The vertical edge should be screwed up, screwing into each of the ridges rather than the flats. Each vertical row should be screwed before moving to the next which will make the roof go on flatter. Use quality screws which have wide rubber washers for maximum coverage and protection. Screwing into the ridges instead of the flats will protect the screws from pooling water.
  1. SITE CLEANUP - Debris should be cleaned up all throughout the roof replacement. All shingles, felt and nails should be deposited in a dumpster or dump trailer. All plastic, paper, or plastic bottles or aluminum cans should be bagged. Roofing magnets should be rolled all throughout your yard to pick up all nails. Your contractor should leave your home and the area around it as clean as they found it.
  2. FINAL INSPECTION - Your contractor should perform a post-installation inspection to make sure the job was done correctly.
    We hope that this article has been informative and helpful. Joye Roofing is here to help you with your roof replacement. We will work with you to answer all your questions and have financing options to fit your budget. Check out our A rating with the Better Business Bureau and rave reviews from past customers.

​If you found this information helpful, click the "like" and "share" buttons below.

    Author

    Derek Joye has been roofing homes and businesses in the Midlands for over 20 years.

    Archives

    June 2020
    May 2020
    April 2020
    March 2020
    February 2020
    January 2020
    December 2019
    November 2019
    December 2017
    November 2017
    September 2017
    August 2017
    July 2017
    June 2017
    May 2017
    April 2017
    March 2017
    June 2016

    Categories

    All
    Attic Inspection
    Chapin
    Cleaning Gutters
    Columbia Roofers
    Columbia Roofing Companies
    Columbia Roofing Contractors
    Columbia Roof Repairs
    Columbia Roof Replacement
    Costs Of Roof Inspection
    Customer Reviews
    Debris On Roof
    Downtown Columbia
    Fallen Tree
    Filing An Insurance Claim
    Free Roof Inspection
    Free Roof Inspections
    Free Roof Inspections Columbia
    Hail
    High Winds
    How To Maintain Your Roof
    How To Solar Panel
    Hurricane
    Hurricane Irma
    Hurricane Preparation
    Hurricane Preparation Checklist
    Ice On Roof
    Ice Storm Damage
    Installing Solar Panels
    Joye Roofing
    Leaky Roof
    Leaky Roof Repair Cost
    New Roof
    New Roof Process
    Online Customer Reviews
    Online Reviews
    Preparing For Hurricane Irma
    Preparing Your Roof For Winter
    Prolonging Roof Life
    Quality Roofing
    Quality Roofing Columbia
    Quality Roofing Materials
    Roof Cleaning
    Roof Cleaning Tips
    Roof Damage
    Roofers
    Roofing Companies In Columbia
    Roofing Company
    Roofing Company Columbia
    Roofing Contractor
    Roofing Materials
    Roof Inspection
    Roof Inspection Cost
    Roof Inspections
    Roof Leak
    Roof Leak Repair Cost
    Roof Leak Repair Cost Columbia
    Roof Leak Repair Costs
    Roof Leak Repairs
    Roof Maintenance
    Roof Maintenance Tips
    Roof Preparations
    Roof Repair
    Roof Repairs Columbia
    Roof Replacement
    Roof Replacement Process
    SC
    Snow On Roof
    Snow Storm Damage
    Solar Panels
    Solar Panels Columbia
    Solar Panels On Roof
    Steps To A New Roof
    Storm Damage
    Storm Damage Inspection
    Storm Preparation
    Storm Preparation For Your Roof
    Wind Damage
    Winter Preparations
    Winter Roof Damage

    RSS Feed

Joye Roofing, Roofing Contractors, Columbia, SC
Picture
Picture
Picture

© 2020 Joye Roofing Company | 105 Drafts Woods Rd., Lexington, SC 29073
Phone: (803) 470-5569 | Fax: (803) 470-3689 | derek@joyeroofing.com | All Rights Reserved | Privacy Policy